
As a notorious Halloween craft junkie, I’m always looking for new things to make to decorate my house with, come October. For some reason I decided that an octopus craft was in order—a creepy, albino, paper mache octopus, to be exact.
Materials
- wire
- a balloon
- tape
- lots of scrap paper
- flour (for paste)
- hot glue gun
- sculpey (on Amazon here for $8)
- acrylic paint (white & black)
How to Make an Octopus out of Paper Mache
At first I had a bit of an interesting time figuring out how to make an octopus out of paper mache, as it’s a bit more of a complicated shape than I’d imagined in my mind, and from how I drew it.
Step 1: Reference Gathering
I started searching around the internet for good octopus sculptures to base this off of (you can see some of my attempts in my Halloween Craft DIY Pinterest board here), and finally found the one you see below, made by a proper artist person out of who knows what. Very advanced, but it was a good shape to start with. NOTE: Again, the picture below is NOT my finished octopus (I wish), it’s a professional sculpture. My reference.
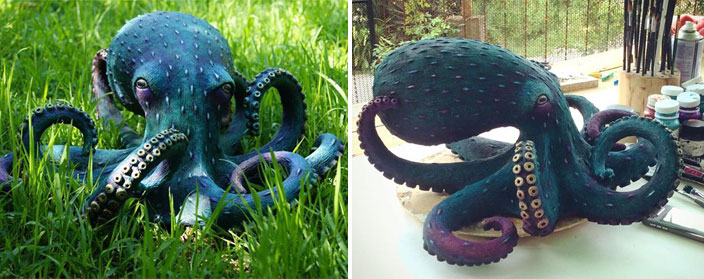

It was really hard to figure out how to credit this artist, as I could only ever find the image by itself, not set into some other page with description. But someone on Pinterest credited a Tasha Vasilek with it, so I’m going to do that too and hope I’m right.
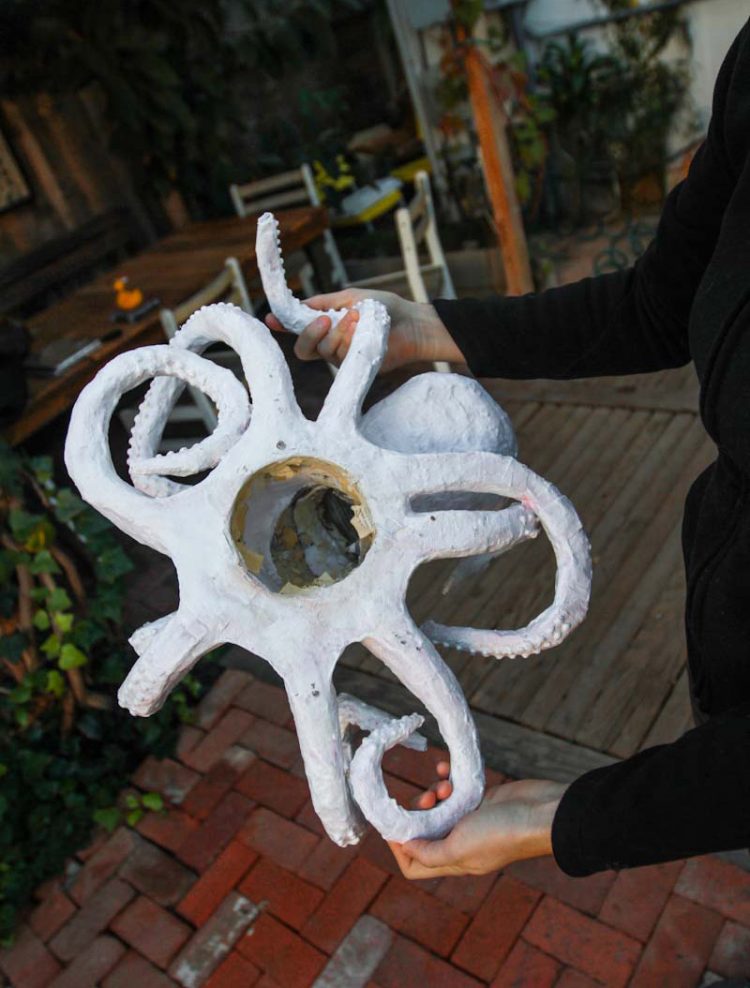
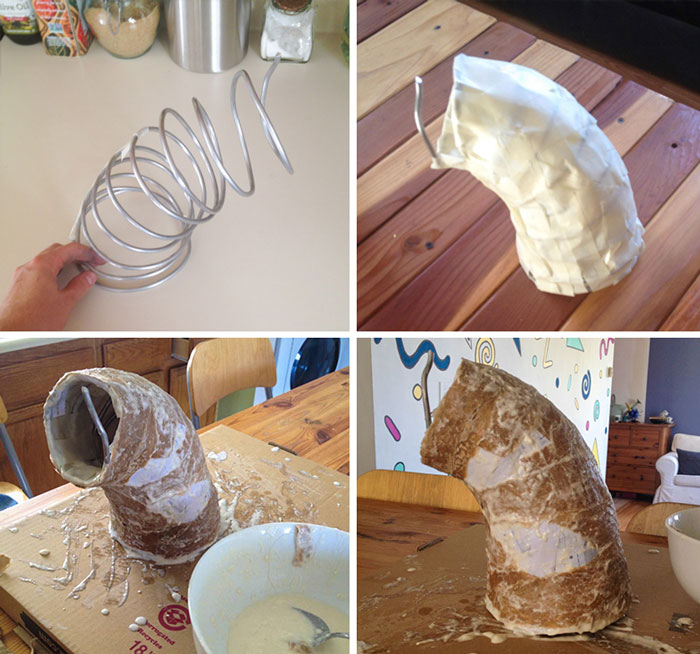
Step 2: Body Frame
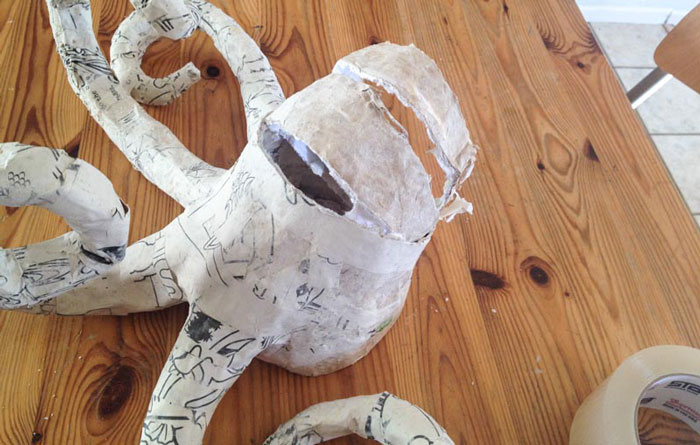
When I was first starting out, my intention was for the octopus head to be able to have a light on the inside so that it sorta glowed through it’s head. So I figured the body base and the head had to be hollow.
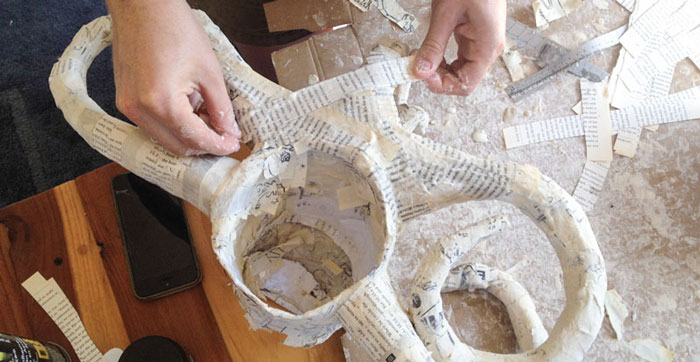
So I found some scrap wire in my craft drawer, and sorta looped it around to make the general shape of the bottom of the octopus, covered it in tape, then paper mached the whole thing.
NOTE: In the end, I never did the light-up head idea, so if I were to re-do this project I’d probably just form the body shape out of crumpled up paper and tape, like I do with the tentacles. I also ended up chopping off some of the end of the head to make it a slightly different shape. But oh well!

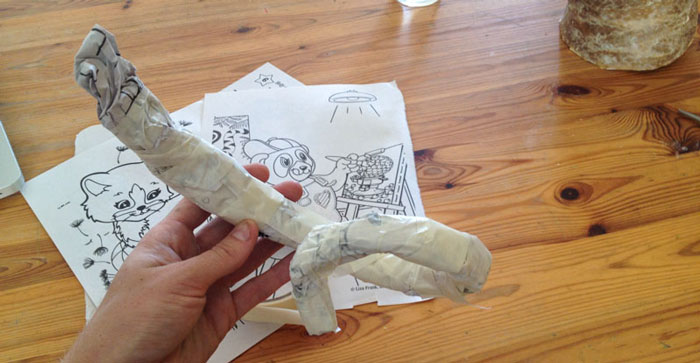
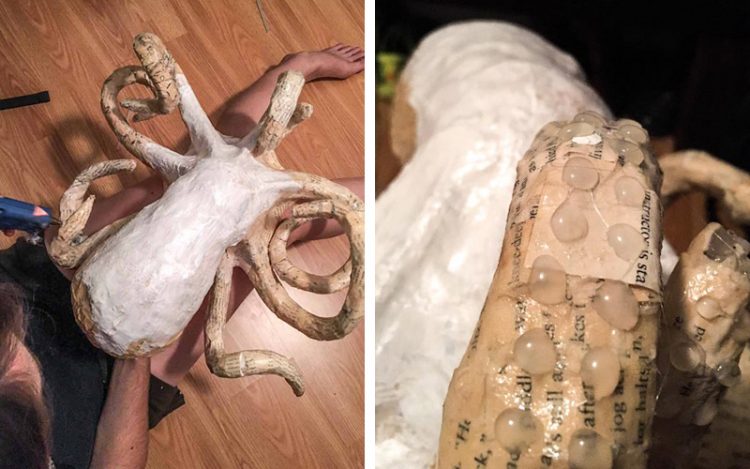
Step 3: Tentacle Time
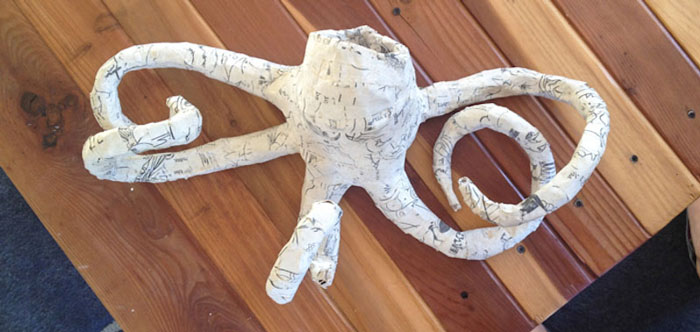
To make the tentacles, take scrap paper and twist and crumple it up into the general shape you want. Tape it up so that it holds the correct form for each tentacle. I decide to only do 5 of the tentacles at this point, since I didn’t want the back ones to get in the way of the head. I add the remaining tentacles later.
Next you’ll paper mache those bad boys (do a few layers for strength)! You can leave them to dry overnight, or put them in the oven on warm, at no more than 200 degrees F for maybe 20-30 minutes.


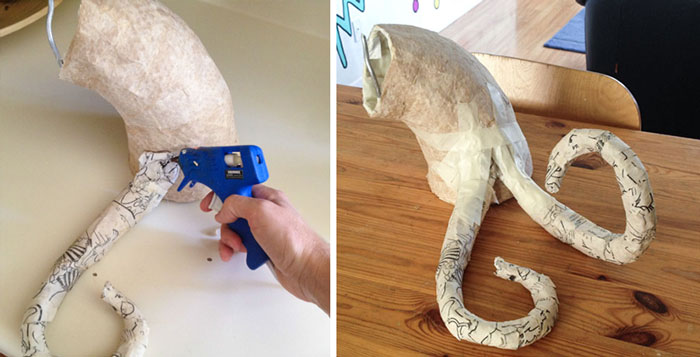
Once you’ve made all the tentacles, you’re going to want to attach them to the main body with hot glue. Use tape to make the connection smooth, and paper mache them on. You should always do a couple layers of paper mache, so that when it’s dry and you knock on it, it feels solid and doesn’t squish in.
At this point I also decided that the head part was a bit too long, so I chopped some of it off and re-shaped it to bend towards the ground a little more, a little earlier.

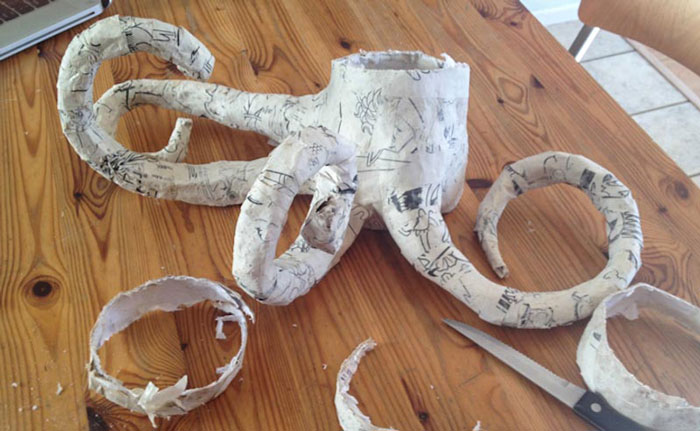


Step 4: Tentacle Details
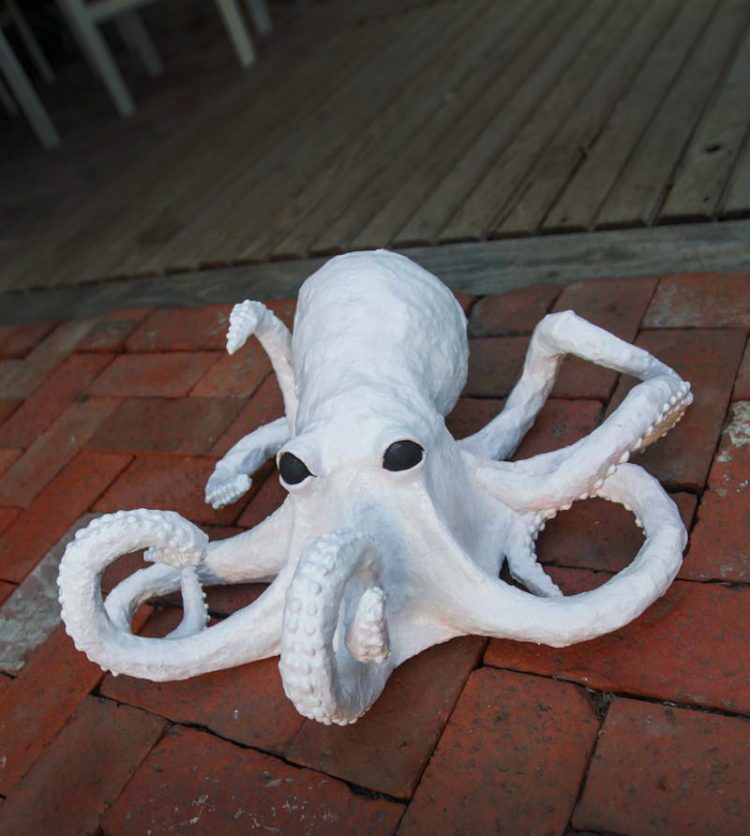
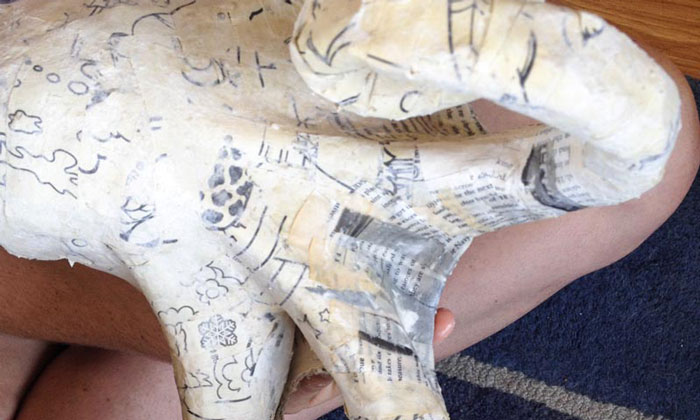
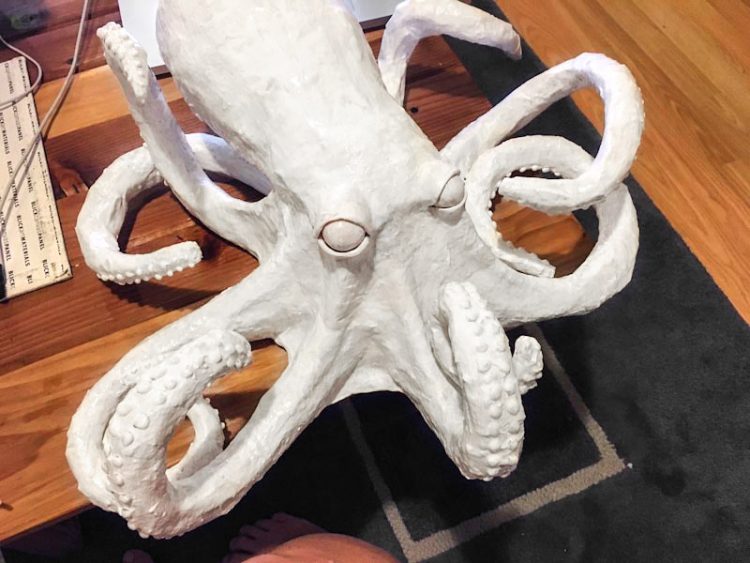
The above octopus tentacles are the basic shape. They look sorta like cartoon-y versions of what a real octopus has. In my octopus reference photo (in Step 1), the top of each tentacle has what looks sorta like raised tendons that run along the top of it.
So I crumpled up a long thin piece of paper (straw-like shape), and taped it down onto the top of each tentacle, and paper mached it on.
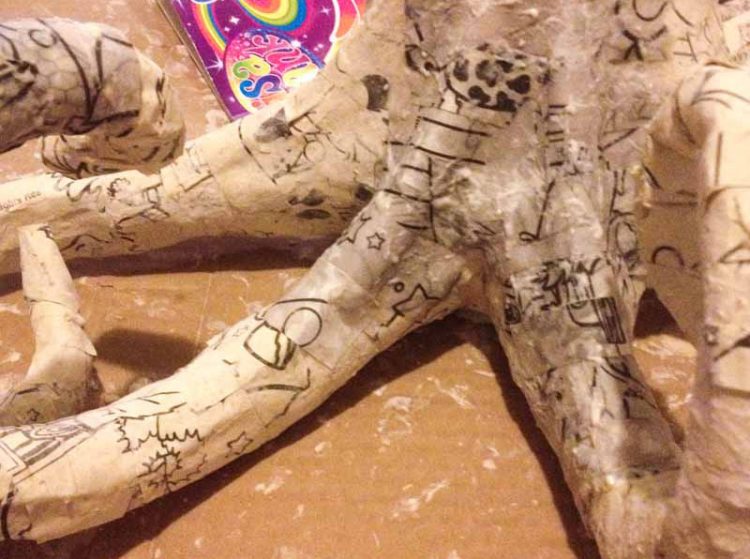
You can see the new “tendons” in the picture of the dried octopus below. I also love this picture because it shows our painted wall that we created for our 90s party (and our house scrap book on the table behind, and my Dr. Seuss taxidermy bird head craft, with updated colors!)


The other detail for the tentacles is that they are actually webbed, like frog toes. So I paper mached underneath the tentacles, creating a “bridge” the gap between each set, and then flipped it back right side up and paper mached from the center of the top of the tentacles down to the new bridge.


Step 5: The Head!
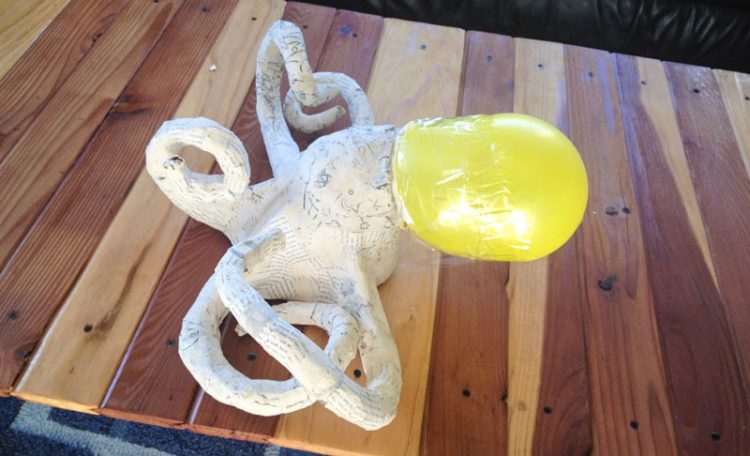
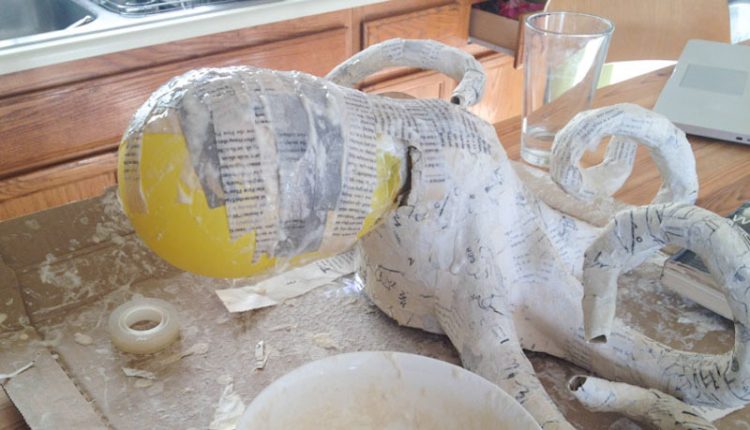
I love using balloons in paper mache—they’re such a useful way to make round shapes without adding weight (e.g. the eyes in my Paper Mache Dinosaur Mask). So of course the octopus head is made out of a balloon!
Basically blow up a balloon as big as you’d like the head, then tape it to the back of the body area. Then paper mache the heck out of it. Do a couple layers so it’s nice and strong, and all the joining areas are smooth and octopus-like.


Step 6: Tentacle Suckers
Gotta add some details to those tentacles! Using a hot glue gun, add big dots all up the underside of the tentacles, in rows of 2.

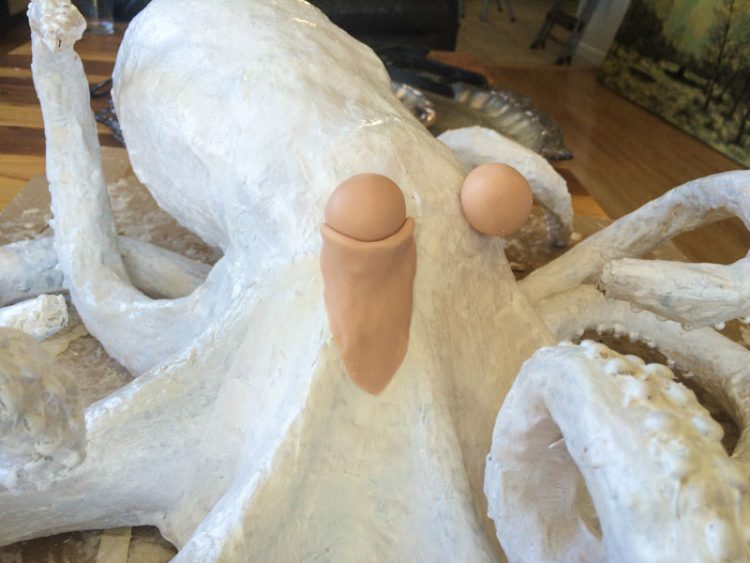
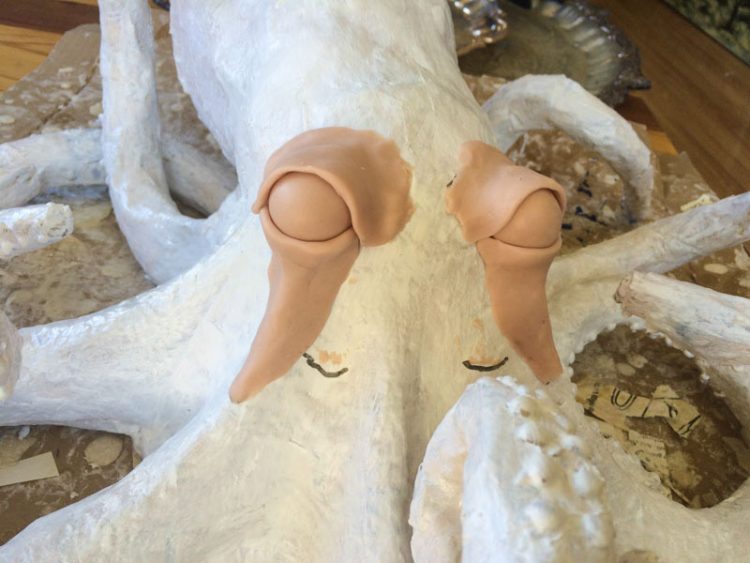
Step 7: Eyes
This part of the octopus craft project is super fun. Sculpt the eyes by making three shapes—the “lower eyelid”, the “eyeball” and the “upper eyelid”. You want the eyeball to nestle in the lower eyelid, and then just fold the upper eyelid over the top of the eyeball and smooth it all down onto the octopus head.
Note: I had started painting the whole thing white before deciding to add eyeballs, but it’d be easier to wait until the very end to paint.
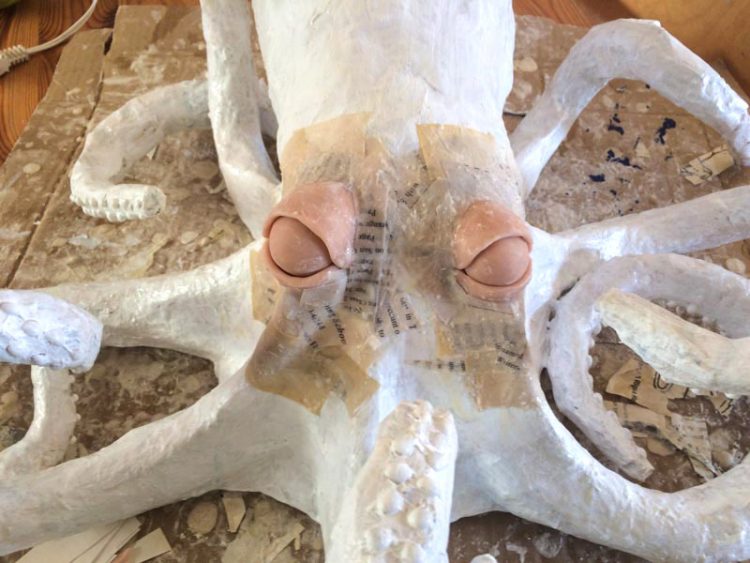
Then you’ll dry the clay—depending on what type you have, either air dry it, or put the whole thing in the oven on LOW. Be sure it’s on low, since you’re sticking a ton of paper in there. The other option is to just bake the eye pieces separately from the octopus, then glue them on.

Next you’ll paper mache over the edges of the clay, to make it all look smooth and uniform.
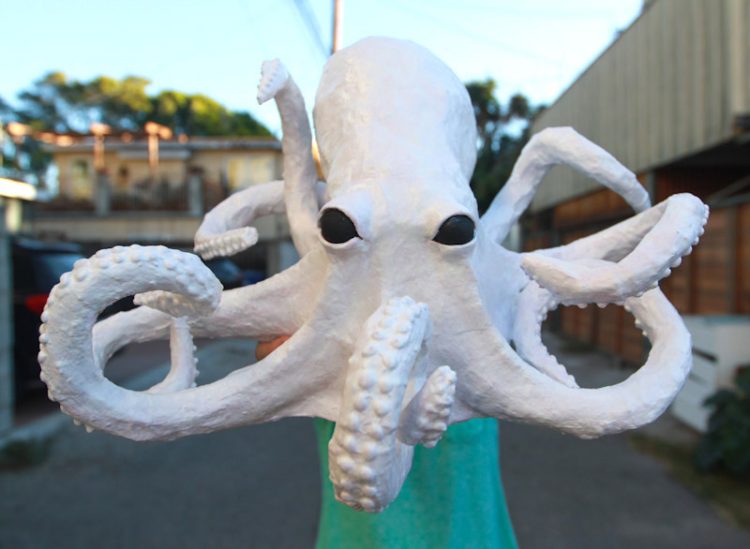
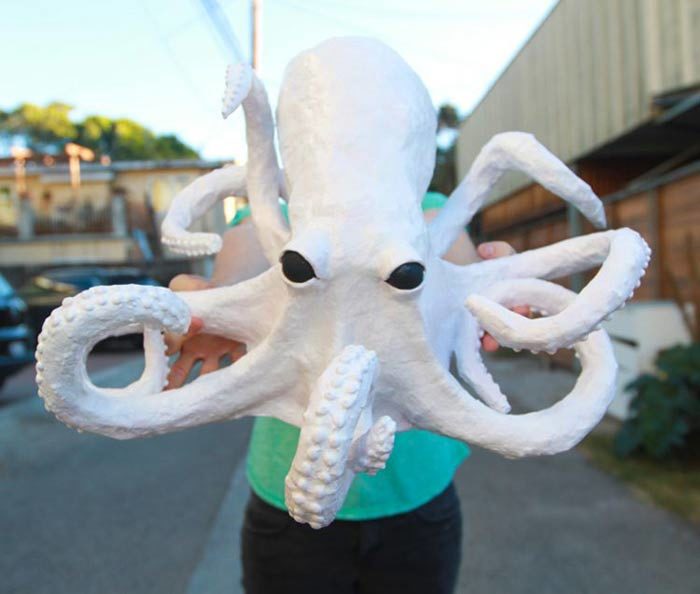
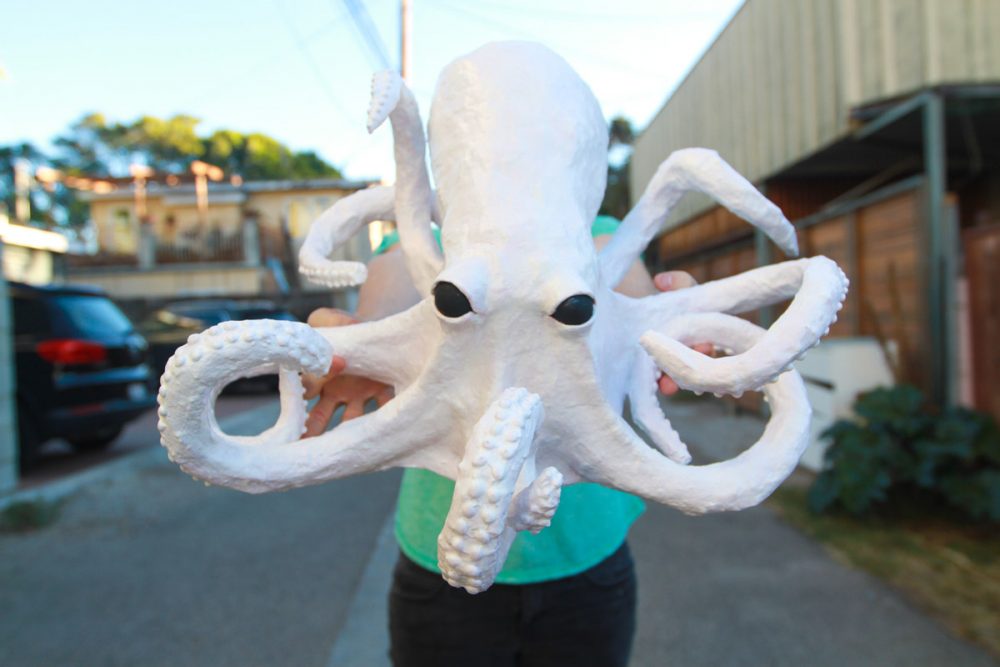
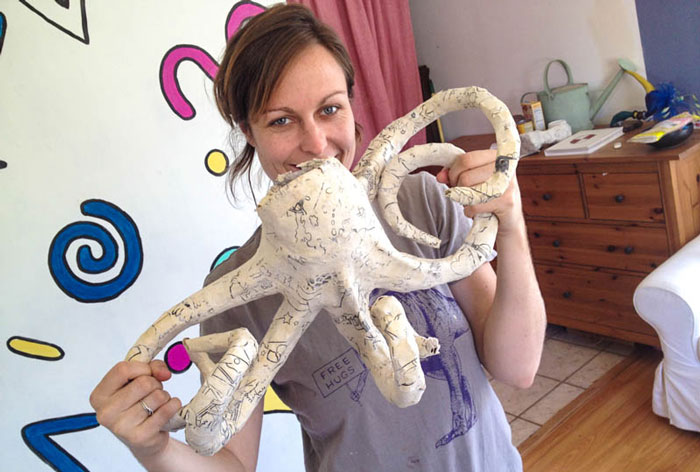
Step 8: Paint
Paint it up however you like. I went with white body and black eyes, since I planned to hang this on my ceiling at a Halloween party, and it felt pretty nice and creepy that way.
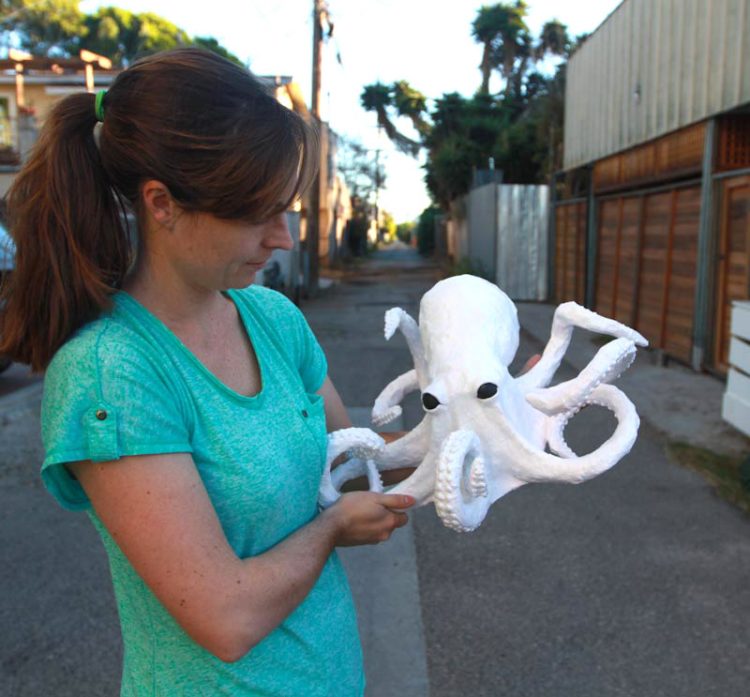
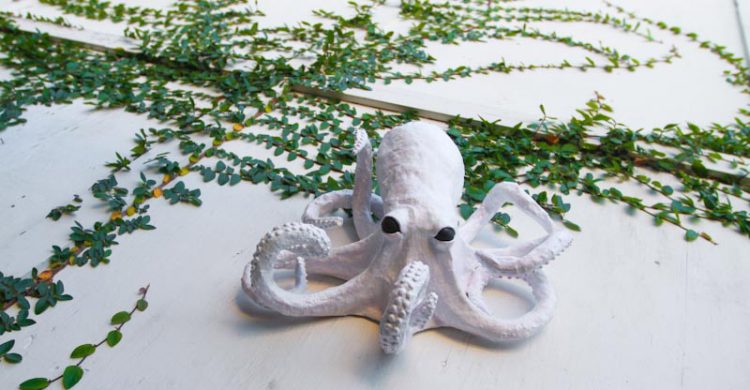
Finished Product
I’m in love! This paper mache octopus ended up being the perfect addition to my creepy Halloween decorations (which include my Zombie Teddy, roommate Photoshop Portraits, and my Nightmare Before Christmas Toy Duck)